Turtle skin problems are surprisingly common. But just because they’re typical doesn’t mean you should leave them untreated. Skin problems are mostly harmless, but ones that aren’t could lead to shell damage or even death.
Today, we’ll cover some of the most common turtle skin problems, their signs and symptoms, what causes these problems, and what you can do to treat these skin conditions. We’ll also discuss how to prevent future issues and keep your turtle healthy throughout the year.
3 Most Common Turtle Skin Problems
Here are the three most common turtle skin problems and the typical signs and symptoms of each:
Fungus
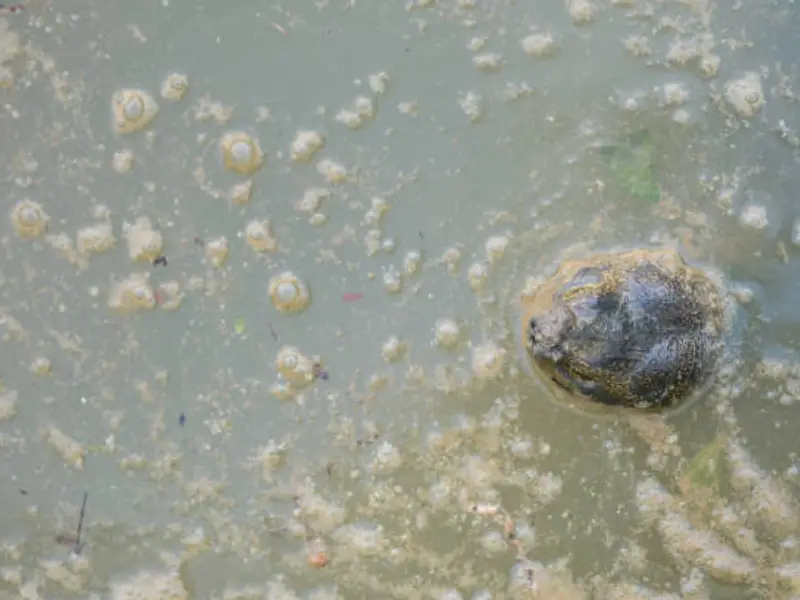
Fungal infections on turtles’ skin are a widespread issue.
Poor or inconsistent sanitation usually causes fungal infections. The biggest culprits are water baths, feeding bowls, and plates left stagnant, where they collect bacteria. This bacteria is the root cause of fungal infections.
Fungal infections develop over a long period and should be visible before it becomes potentially damaging. But if you don’t treat the fungal infection, it could become an abscess or a severe condition that spreads to bone tissue. A severe infection could be fatal without treatment.
Signs Of Turtle Fungus
To determine if your turtle is suffering from a fungal skin infection, look for the following signs:
- Fuzzy patches
- Rotting or unpleasant smell
- Discharge from the shell or skin
- Shell plates are falling off
Infection
Turtle skin infections, or shell rot, can be seriously harmful. Parasites, bacteria or unchecked fungal growth causes shell rot. While shell rot and fungus infection might overlap in symptoms, shell rot is more severe as it causes trauma to the shell.
A healthy turtle shell is essential. A turtle with a damaged shell is vulnerable to predators, environmental dangers, and health issues.
Skin infections can damage the shell and the bony tissue. This damage leaves your turtle with a pitted and scarred shell that can no longer protect its vulnerable body and organs.
Signs Of Turtle Infections
To determine if your turtle is suffering from a skin infection caused by a parasite or bacteria, look for the following signs:
- A soft shell with reddish fluid
- Pitting under the shell
- Breaks in the shell
- Unpleasant odors from the shell
- A slimy coating on the shell (not algae)
- Bleeding from shell cracks
Abscesses
Abscesses are puss-filled infections on the skin. Vitamin A deficiency typically causes abscesses in turtles. An abscess in turtles is usually hard and dry. When they burst, the puss is also more solid than you would expect.
In turtles, abscesses are common around or behind the eyes and ears. They’re uncomfortable or downright painful for them.
Signs Of Turtle Abscesses
To determine if your turtle is suffering from an abscess, look for the following signs:
- Unpleasant smell
- Hard swellings on the body, especially around the eyes and ears
- Pus that is hard and clumpy
What Causes Turtle Skin Problems?
Turtle skin problems don’t appear without reason and there are several things that may contribute to your pet turtle’s condition. Often, it’s an amalgamation of internal and external factors that cause turtle skin problems.
Unhygienic Environment
The most significant cause of fungal infections is poor hygiene. Stagnant water and high humidity are prime conditions for these skin issues to flourish. Bacteria and fungi grow at unprecedented rates and overwhelm turtle shells, their skin, and their immune systems.
Inhospitable Environment
Different turtle species have different needs. If the substrate, temperature, humidity, and water needs are not met, their bodies suffer.
For aquatic turtles, this can cause dehydration, leading to shell cracks. These wounds are breeding grounds for harmful bacteria and can be fatal for an already overwhelmed turtle.
For arid turtles (tortoises), humid or perpetually wet environments can soften their shell (their best line of defense) and make them vulnerable to harmful bacteria.
Injuries
Shell rot often requires an injury to take root. Sometimes, other turtles cause these injuries. Male turtles might attack and injure other turtles, leaving them with shell injuries. You can minimize the risk of injuries by not putting clashing turtle species, or several males, in the same habitat.
But shell injuries are also caused by turtle habitats that are not optimized for safety. Tight spaces, high rocks or toys, or sharp edges can cause severe shell damage that eventually may lead to shell rot.
Malnutrition
Not all turtles eat the same. They digest foods differently and have different nutrient needs. Owners that need to do more research could be feeding their turtles far below their nutritional needs, which makes them susceptible to disease and injury.
Malnutrition also means slow recovery. Without the proper nutrition, a turtle’s immune system cannot function at 100%.
Stress
Similar to how malnutrition puts turtles at risk, so does stress. Constant fights with other incompatible species, poor hygiene, and an inhospitable environment are all things that will make your turtle stressed.
A stressed turtle is much more likely to have a compromised immune system and fall prey to skin infections.
How To Treat Turtle Skin Problems

Now that you know what issues your turtle might face, let’s cover how you can treat them at home.
If you are uncomfortable with any procedures or methods or feel your turtle needs immediate help, we recommend seeing a specialized vet for professional assistance.
Clean Out The Tank
The first thing any turtle owner with a sick turtle needs to do is clean out the tank. If you don’t clean out your turtle’s tank, you’ll only remove the bacteria from your turtle itself. Then, when you put your turtle back, you’ll expose it to the same harmful bacteria and conditions.
So, if you want your turtle to get better and stay better, you’ll first need to do a thorough tank cleaning.
To do a complete tank cleaning, do the following:
- Remove your turtle from the tank. Make sure you put your turtle somewhere safe.
- Next, remove all loose items from your turtle’s habitat. Put them aside for now.
- With a brush and hypoallergenic cleaner, wash the habitat. Clean the glass and rinse thoroughly. Get into all the nooks and crannies of the tank to ensure everything is gone.
- Leave the tank out to dry.
- Next, wash all loose items in the tank. Scrub them with the same soap, rinse thoroughly, and leave them to dry completely. If the item isn’t washable, we’d recommend replacing it.
- Clean the filters. If you use a fish tank filter, remove half the old water and top it up with clean water weekly. This will keep some of the good bacteria.
- Finally, wipe down the basking lamp, assemble the tank, return everything to the habitat, and welcome your turtle home after their wash.
Remove The Fungus
After you’ve cleaned your turtle’s tank, it’s time to help it on its road to recovery. If your turtle is fine beyond the fungus patches, you can carry on with this step. But if there are more significant issues, see a vet to get professional help and specialized medication.
To remove fungus from your turtle, do the following:
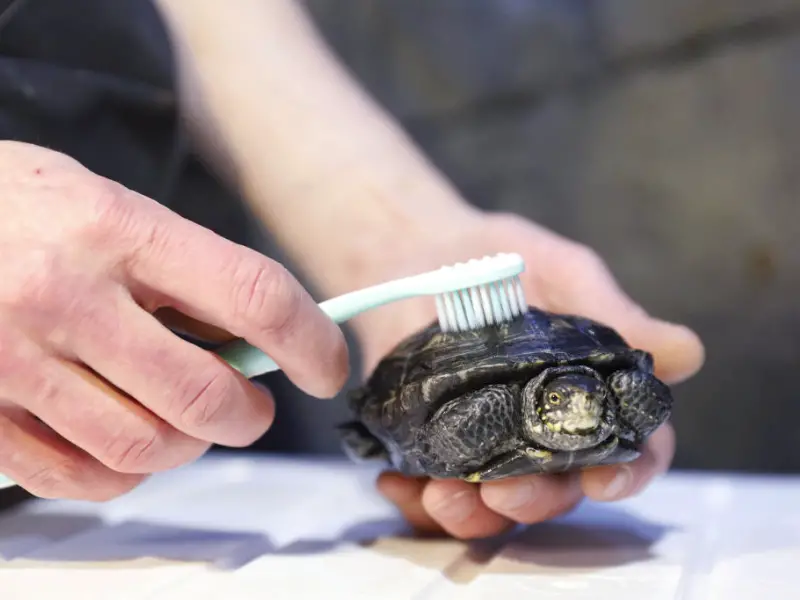
- Remove the turtle from its container. You must put your infected turtle back into the clean cage only after you’ve finished the first treatment. If you have more than one turtle sharing a tank, you must wash all the turtles. Keep the washed turtles away from the unwashed ones.
- Carefully wet your infected turtle with water and add a bit of hypoallergenic, reptile-safe soap to its shell. Take a toothbrush and gently scrub the fungus. Do this until you soften and remove the most extensive patches.
- Next, rinse and dry the turtle thoroughly.
- Finally, wipe your turtle down with a diluted iodine solution.
- Put your turtle down in a clean enclosure and let the diluted solution dry naturally or with the help of a lamp.
Alternatively, you can use the salt bath method to remove fungus from your turtle.
Do A Salt Bath (An Alternative Option)
Like with the hypoallergenic wash, keep your washed and unwashed turtles away from each other.
- First, remove your turtle from its container.
- Combine 2 to 3 tablespoons of salt with a gallon of tepid water. Pour the salt into the water and stir until you’ve dissolved all the salt.
- Next, take your turtle and gently lower them into the water. The goal is to cover only the shell.
- Let your turtle soak in the solution for 15 to 20 minutes.
- When the soak is done, take your turtle out and let them dry.
Salt helps prevent fungus from returning and is a skin-safe method for most turtles. You can repeat the salt bath twice daily and do this and the wash treatment above for around 2 weeks.
Do A Topical Treatment Soak (Another Alternative)
Another method to treat turtle skin problems is a topical treatment soak.
- Remove your turtle from its container.
- Next, wash your turtle under warm water. Use a toothbrush to scrub the fungus gently. Don’t be rough, and make sure the water isn’t hot.
- After you have washed your turtle, it’s time to soak its shell in a turtle antifungal solution. If you don’t know what to use, talk to your vet and ask which is safe for your turtle.
- Follow the dilution process instructions and soak your turtle for the recommended time. Make sure only to cover the shell.
- When the time is up, remove your turtle and let them dry.
- Apply a thin layer of antibiotic ointment (that contains Betadine) to the areas of the shell with fungal patches.
Abscesses Are Treated Surgically
Don’t attempt to treat turtle abscesses at home. If you suspect your turtle has an abscess, you need to take your turtle to the vet.
At the vet, they will surgically remove the abscess by opening the abscess with sterilized equipment and gently removing the pus. Afterward, they will flush the wound before applying a cleaning solution.
Depending on the type of abscess, your vet will give you an ointment or other medication to help with the recovery. Follow the instructions and keep your turtle tank clean and optimized for its species.
Supplement Nutrition & Vitamin Deficiencies
Similar to abscess treatment, it’s best to consult your vet about deficiencies and nutritional support. Many turtles suffer from Vitamin A deficiency, but giving them too much can be fatal.
Talk to your vet about your turtle’s needs, which brands are the best, and how you can incorporate varied foods into your turtle’s system.
A better diet will help them recover from their skin problem, and it will help prevent future issues.
How To Prevent Turtle Skin Problems
We all know the adage “prevention is better than a cure,” and nowhere is it more true than with turtle skin problems.
Most turtle skin problems are preventable. You can prevent turtle skin problems by being consistent with the health and well-being of your turtle’s diet and environment. So, if you want to avoid having a sick turtle in the future, here’s how to prevent turtle skin problems.
Ensure Optimal Hygiene
One of the best ways to keep your turtle happy and healthy is by keeping its environment clean.
Clean your turtle’s cage regularly, replace the water, and keep any rotting or bacteria-ridden things from the enclosure.
Keep filters clean. Wipe the food and water dish every day. Clean the habitat walls and other surfaces.
Your goal should be to create a clean environment, one that’s optimized to support the health of your turtle.
Create The Right Environment
Different turtle species have different needs. Some need more space to bask, and others need more water. Some prefer humid environments and others need cooler air.
Ask yourself the following questions:
- Do they have enough water? Do they have too much?
- Are they getting enough sunlight?
- Do they have enough space to roam?
- Is the tank too hot or too cold?
It’s also essential you use suitable substrate in your habitat. Make sure the temperature and humidity are correct for your turtle’s needs.
Keep all these things in mind when creating their home. If the turtle’s environment is right, its skin and shell won’t under or over-perform to keep up, and skin problems will be a lot less likely to occur.
If you need help, we have many care guides and species profiles on various types of turtles to help you navigate this obstacle.
Do Species-Specific Research
As we mentioned earlier, some species are not compatible with other species. They fight and bully each other when you force them to share space. This bullying leads to shell injuries and shell rot.
Living in this hostile environment is also not optimal for their emotional well-being. Constant stress will negatively impact your turtle’s immune system and its ability to fight diseases.
Do species research and consult with professionals about which turtles are compatible and which are not.
Conducting research on your species of turtle will also ensure you know the proper way to care for it and give it what it needs.
Support With Nutrition
Support your turtle with proper nutrition. A healthy and varied diet will keep your turtles healthy and robust and provide the necessary tools to fight skin issues and diseases.
Encourage A Safety-First Environment
Although a hard shell protects them, turtles can be prone to accidents. These accidents could put them in situations that compromise them and open them up to pathogens and other problems.
When you build your turtle’s habitat, create it with safety in mind. This means creating species-focused environments with lots of open space for roaming. Avoid sharp rocks or edges that could leave them wounded, and ensure there are no tight spaces where they could get stuck.
Another thing to consider is high spots. Ensure there are no platforms they could fall from or surfaces that could accidentally tip them over.
Be On The Lookout For Skin Issues
To reiterate the prevention method mentioned earlier, keep an eye out for skin conditions. Regularly inspect your turtle’s shell, and don’t ignore any weird smells, bumps, or build-up. If you catch a skin problem early on, you can treat it before it becomes a big issue.
Consistency Is Key
Lastly, be consistent. Being consistent is great for you and your turtle. You’ll notice issues immediately when you are consistent with cleaning habits, nutrition, and check-ups. It will also save you a lot of work and stress in the future.
Your turtle’s health is reflected in its skin and shell. So keep an eye on your turtle and consistently check its shell and skin for any issues.
Conclusion
While there are many different turtle skin problems, owners can do a lot to prevent these common issues.
Follow our guide and always keep your turtle clean, happy, fed, and safe. If you look after your turtle well and get to know its habits, you’ll quickly be able to spot and prevent common skin problems from worsening.
Should you feel uncomfortable with a specific treatment, consult a specialized vet that works with exotic pets like your turtle.